
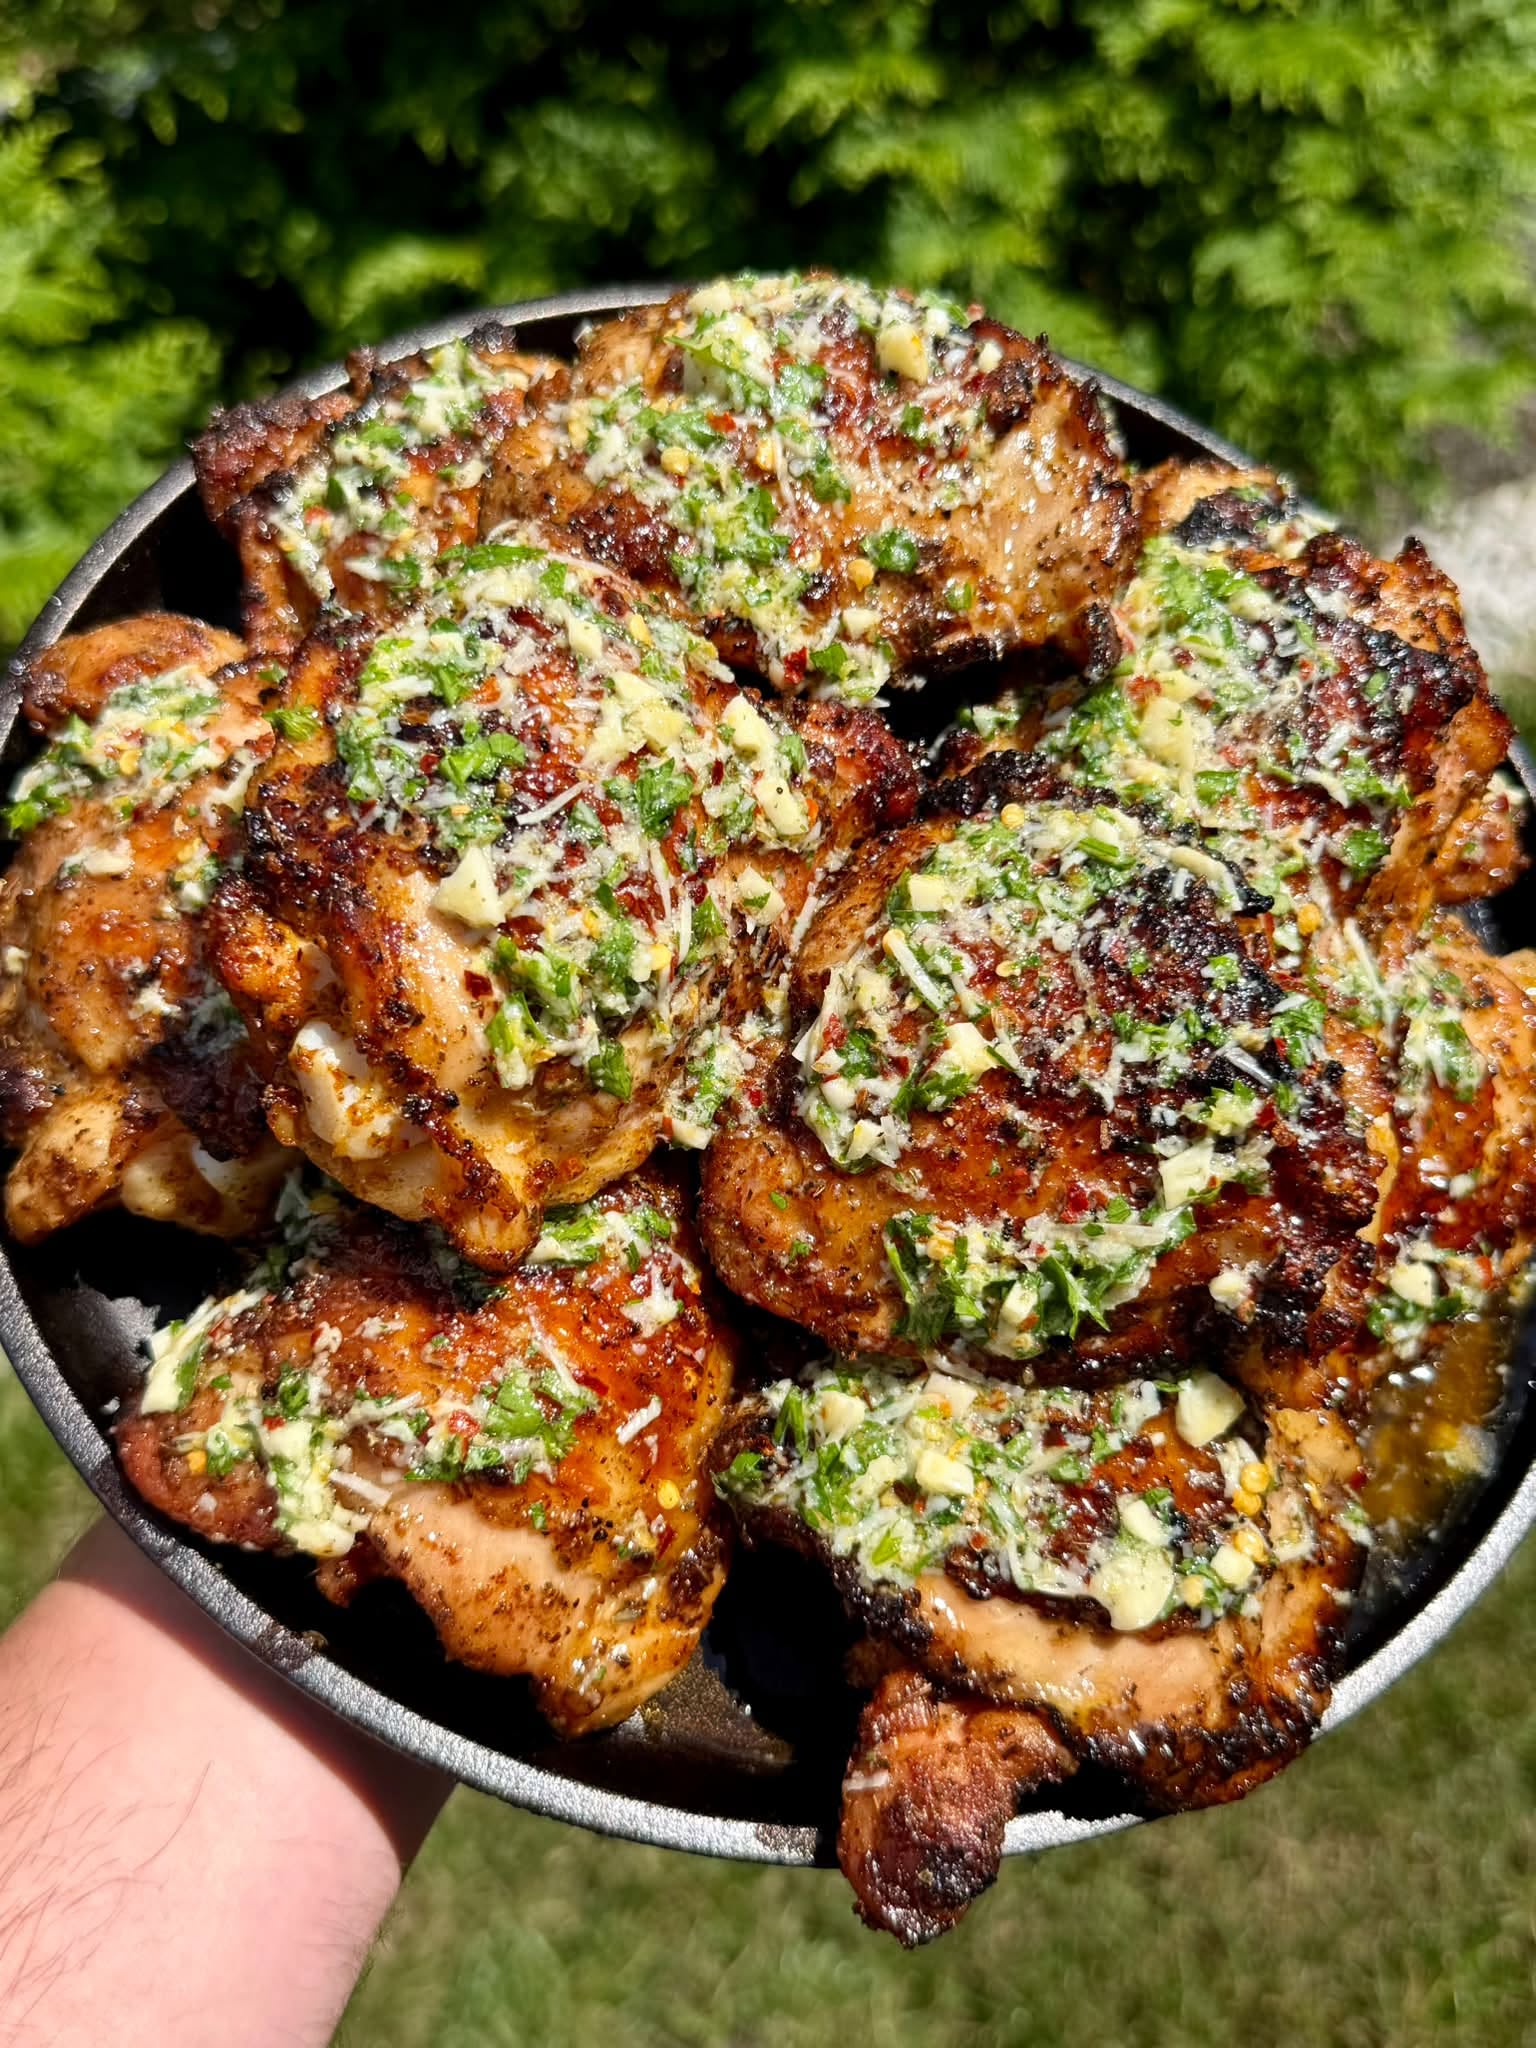
Why Grilled Garlic Parmesan Chicken Thighs Beat the Oven Version
Most garlic parmesan chicken thigh recipes you find online finish in the oven, on a sheet pan, or in an air fryer. Those versions work, but they all share the same flaw: no smoke, no char, and skin that softens instead of crisps. Grilled garlic parmesan chicken thighs solve every one of those problems. The combination of direct-flame searing and indirect finishing is what separates a good chicken thigh from a great one.
Two factors do the heavy lifting here: rendered fat and char on the skin. When skin sits over direct heat, the fat melts out and the surface dehydrates, which is exactly what makes it shatter when you bite in. Meanwhile, the meat finishes cooking gently over indirect heat, so it stays juicy instead of drying out. As a result, the split-temperature approach is the reason a backyard grill outperforms an indoor cook for this specific recipe.
What Makes Grilled Skin Better Than Baked
Baked skin steams in its own moisture. Grilled skin sits in open air with fat dripping away, so it crisps and develops Maillard browning that an oven can never match. Furthermore, the flame contact creates light char on the high points of the skin, which adds a smoky bitterness that balances the richness of the garlic butter and parmesan finish.
You also get faster fat rendering on the grill. Direct heat hits 600°F or hotter at flame contact, while a 375°F oven maxes out the surface temperature at the air temperature itself. Therefore, grilled skin renders in 5 to 8 minutes, while baked skin can take 25 minutes and still come out flabby in spots.
Chicken seasoning blend with paprika, garlic powder, salt, and pepper in a glass bowl
Why Bone-In Beats Boneless for This Recipe
Bone-in chicken thighs hold moisture better and forgive small temperature mistakes. The bone insulates the deepest meat from overcooking, so you can push the internal temperature into the 180s without drying out the bird. Boneless thighs work too, but they cook in roughly half the time and lose the buffer that makes this method nearly foolproof. For garlic parmesan grilled chicken specifically, bone-in is the right call because you want the longer cook time to fully render the skin.
Should You Grill Chicken Thighs Skin-Side Down or Skin-Side Up First?
Grill chicken thighs skin-side down first to render the fat and crisp the skin, then flip skin-side up over indirect heat to finish cooking to 175 to 185°F. This is the single most important technique decision in the whole recipe, and it is the reason this method beats every chicken thigh recipe that says to flip “halfway through.”
Starting skin-side down does three things at once. First, the fat under the skin renders directly into the surface, which is what creates that crackling texture. Second, the skin builds char and color before the meat is anywhere near done. Third, the protein contracts and tightens against the heat, which seals the moisture inside before the bird sees indirect heat. If you flip too early, the skin steams from the inside and you lose all of that.
How Long to Sear Skin-Side Down
Plan on 5 to 8 minutes skin-side down. The exact time depends on how much your grill flares and how hot your direct zone runs. Look for a deep golden-brown skin with light blackened high points. If the flames jump, slide the thighs over a few inches and keep cooking. Color is good. Burnt is bad.
Bone-in skin-on chicken thighs searing skin-side down over direct grill flames
Why You Only Flip Once
Flipping back and forth wrecks the skin. Each flip drops the surface temperature, lets the rendered fat run, and gives the skin time to soften. One flip, then finish on the indirect side. That is the whole approach. Likewise, this is the same single-flip principle behind a great compound-butter steak, where minimal interference produces maximum surface character. If you have run the same single-flip move on a bone-in cut before, you already know the rhythm.
What Internal Temperature Should Grilled Chicken Thighs Reach?
165°F is the USDA-safe minimum, but bone-in chicken thighs eat best when pulled at 175 to 185°F because the connective tissue and fat have not fully rendered at the lower temperature. Pulling thighs at 165°F leaves money on the table. That extra 10 to 20°F is where the texture breaks from “fine” into “great.”
The reason has to do with how dark meat is built. Chicken thighs contain more collagen and intramuscular fat than breasts, and both need to break down for the meat to eat tender. Collagen starts converting to gelatin around 160°F, but the conversion accelerates above 170°F. As a result, a thigh pulled at 165°F can feel slightly chewy and stringy, while a thigh pulled at 180°F shreds cleanly off the bone. The internal temp for grilled chicken thighs is one of the few places where the USDA minimum and the optimal eating temperature genuinely diverge.
Crispy grilled garlic parmesan chicken thighs resting in a cast iron skillet
Probe Placement Matters
Stick the probe into the thickest part of the thigh, parallel to the bone, without touching the bone itself. The bone reads cooler than the surrounding meat and will give you a false low number. Pull the bird out of the probe and into a different spot if your reading jumps around. Reliable instant-read probes settle within two seconds. If yours does not, the placement is wrong.
What 175 to 185°F Actually Looks Like
At 175°F the juices run clear and the meat pulls cleanly from the bone with light resistance. By 185°F the connective tissue has fully gelatinized and the meat slides off. Both are good. Anywhere in that range delivers a tender bite. Below 170°F the meat eats firmer and the fat has not fully rendered. That is the gap most home cooks fall into when they trust the 165°F number on the package.
How Long Does It Take to Grill Bone-In Chicken Thighs?
Bone-in chicken thighs take roughly 25 to 35 minutes on a 375 to 400°F two-zone grill. The breakdown is 5 to 8 minutes searing skin-side down over direct heat, then 20 to 30 minutes finishing skin-side up over indirect heat. Total time depends on thigh size and grill behavior, not a stopwatch.
Smaller thighs (around 5 ounces each) finish closer to 25 minutes. Larger thighs (8 ounces or more) push toward 35 minutes. Likewise, charcoal grills tend to run hotter and finish faster, while pellet grills dialed in at 375°F finish on the longer end. A reliable instant-read probe tells you when they are done. The clock just gives you a window to start checking.
Bone-in chicken thighs grilling on a Weber kettle with two-zone setup
Boneless Thighs Cook Faster
If you are working with boneless skin-on thighs, cut the total time roughly in half. Plan on 4 to 5 minutes skin-side down, then 8 to 12 minutes skin-side up to hit the same 175 to 185°F finish. The technique is identical. Only the timing changes.
Resting Time Counts
After the thighs come off, brush them with garlic butter, top with parmesan, and let them rest 5 minutes before serving. The rest matters because the juices need to redistribute, and the parmesan needs a minute to soften and grip the skin. Skipping the rest is how you end up with juices on the cutting board instead of in the chicken.
Setting Up a Two-Zone Grill for Chicken Thighs
A two-zone grill has one direct-heat side and one indirect-heat side, with the overall chamber temperature running 375 to 400°F. This setup is the foundation of every chicken thigh recipe worth cooking on a grill. Charcoal grills, gas grills, and pellet grills with a direct-flame zone all build a two-zone setup the same way functionally, even if the mechanics look different.
On a charcoal grill, pile lit coals on one half of the grate and leave the other half empty. On a gas grill, light the burners on one side and leave the others off. Pellet grills with a sliding sear plate or a dedicated direct-flame zone can run two-zone if you set the grate accordingly. In every case, the goal is the same: a hot side for searing the skin and a cooler side for finishing the meat without burning.
Target Grate Temperatures
Aim for around 500 to 550°F at the grate over the direct side and 350 to 375°F over the indirect side. The chamber temperature averages out to 375 to 400°F, which is the number you will see on most grill thermometers. If your direct side runs hotter than 600°F, the skin scorches before the fat fully renders. Conversely, if it runs under 450°F, the skin will not develop the char that makes this recipe.
Garlic parmesan grilled chicken thighs finishing on the indirect side of a two-zone grill
Charcoal vs Gas vs Pellet for This Recipe
Charcoal delivers the strongest flavor and the easiest two-zone setup. Gas is the most consistent and the fastest to dial in. Pellet grills with a direct-flame zone, like the Pit Boss Lockhart or a Hasty Bake on its grilling configuration, give you smoke flavor plus direct char. All three work for charcoal grilled chicken thighs garlic parmesan or pellet grill garlic parmesan chicken thighs alike. Pick the one in your backyard and run it.
How to Manage Flare-Ups
Chicken skin drips fat, and dripping fat ignites. When flames jump, slide the thighs over a few inches and keep them moving. Do not close the lid on a live flare-up. The flame needs air to burn off, and a closed lid traps it against the meat. A spray bottle of water near the grill helps for emergencies, but the better move is positioning. Likewise, the same flare-up management applies to chicken halves with rendered skin when you are working with bone-in cuts on direct heat.
The Air-Chill Step That Crisps the Skin
Season the thighs and place them uncovered in the refrigerator for 1 hour before grilling. This single step changes the texture of the skin more than any other technique in the recipe. Drier skin renders faster, browns harder, and crisps more evenly. Wet skin steams. That is the whole game.
The fridge does two things during that hour. It pulls surface moisture out of the skin through evaporation, and it lets the salt in the seasoning penetrate the meat through dry-brining. Both effects compound. After 60 minutes you have a tackier surface that grips seasoning better and a slightly seasoned interior that holds moisture during the cook. Furthermore, an hour is plenty. Longer does not hurt, but the diminishing returns kick in fast.
Seasoned bone-in chicken thighs air-chilling uncovered in a glass baking dish
What “Uncovered” Actually Means
Place the seasoned thighs on a wire rack over a sheet pan, or directly on a glass baking dish, with no plastic wrap or foil on top. Air needs to hit the skin. If you cover them, the moisture stays trapped and the whole step is wasted. A wire rack is best because it lets air circulate underneath too, but a flat dish works fine if that is what you have.
Can You Skip the Air-Chill?
You can, but the skin will crisp less aggressively and the cook will need a few extra minutes on the direct side. If you are truly short on time, pat the thighs as dry as possible with paper towels and skip directly to the grill. The recipe still works. It just will not deliver the same crispy grilled chicken thighs result that the air-chill produces. For a deeper look at how the same technique compounds across grilled chicken recipes, the same air-chill principle works on smoked chipotle BBQ chicken where rendered skin is just as critical to the finished bite.
