
Engaging Introduction
Creamy, tender, and luxuriously soft—perfect scrambled eggs aren’t about fancy tools or rare ingredients. They’re about technique, timing, and a little patience. Follow these chef-backed steps, and you’ll never serve rubbery eggs again.
I remember the first time I had truly perfect scrambled eggs. I was at a diner in a small town, expecting the usual dry, brown-edged breakfast fare. But when the plate arrived, the eggs were pale yellow, soft, and almost custard-like. I took a bite and my eyes widened.
These weren’t scrambled eggs. These were clouds. They were silk. They were everything I never knew eggs could be.
I asked the cook his secret. He shrugged. “Low heat. Patience. Pull them off before they look done.”
That was the moment I realized I’d been making scrambled eggs wrong my entire life. High heat. Constant high-speed stirring. Cooking until they looked “done” in the pan. The result was always dry, rubbery, and in need of ketchup.
Now I know better.
Let me teach you.
The Core Principles of Perfect Scrambled Eggs
Low and slow heat = creamy texture. High heat toughens egg proteins. Low heat keeps them tender.
Constant gentle stirring = even cooking, no dry patches. Stirring prevents large, tough curds from forming.
Remove from heat early = residual heat finishes the job. If your eggs look done in the pan, they’re already overcooked.
Fat is your friend = butter adds richness and prevents sticking. Don’t skimp on the butter.
Ingredients (Simple, High-Quality)
4 large eggs (room temperature – this matters!)
2 tablespoons unsalted butter (cold butter, cut into small cubes)
¼ teaspoon salt (flake sea salt or kosher, not fine table salt)
Freshly ground black pepper (optional, to finish)
Fresh chives or parsley (optional, for garnish)
Why room temperature eggs matter:
Cold eggs seize up when they hit a warm pan. Room temperature eggs (take them out of the fridge 15-30 minutes before cooking) incorporate more smoothly and cook more evenly.
Step-by-Step – The Foolproof Method
Step 1: Crack and Whisk (Gently)
Crack the eggs into a medium bowl. Add the salt.
Important: Salt the eggs before cooking. This breaks down the egg proteins slightly, resulting in more tender curds.
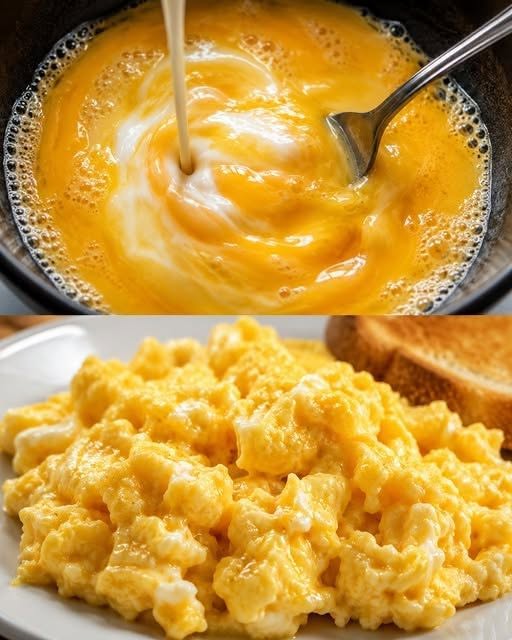
Whisk with a fork until the whites and yolks are fully combined. You want a uniform yellow color with no streaks. Don’t over-whisk (you’re not making meringue), but don’t under-whisk (streaky eggs are uneven).
How long? About 30 seconds.
Step 2: Prep Your Butter
Cut the cold butter into small cubes. You’ll add it in two stages.
Step 3: Heat the Pan (Low and Slow)
Place a nonstick skillet over low heat. Not medium-low. Not medium. Low.
Add half the butter cubes (about 1 tablespoon). Let them melt slowly. The butter should foam gently but not brown. If it sizzles aggressively, your pan is too hot. Remove it from the heat for a moment to cool down.
Step 4: Add the Eggs (And Wait)
Pour the eggs into the pan. Then—here’s the hardest part—do not touch them for about 30 seconds.
Let the eggs sit undisturbed. You’ll see the edges begin to set while the center remains liquid. This is correct.
Step 5: Stir Constantly (But Gently)
Using a rubber spatula, begin stirring slowly but constantly. Scrape the bottom of the pan, pushing the set eggs toward the center. Tilt the pan so the liquid egg runs back to the edges.
The technique: You’re not scrambling like you’re stirring a pot of chili. You’re folding, pushing, coaxing. Think “gentle” and “slow.”
Step 6: Add the Remaining Butter
After about 1-2 minutes, add the remaining butter cubes. Stirring constantly, let them melt into the eggs.
The butter does two things: adds richness and helps regulate temperature (the cold butter cools the eggs slightly, slowing down cooking).
Step 7: Watch for the “Shiny” Stage
Continue stirring and scraping until the eggs are mostly set but still look moist, shiny, and slightly underdone. They should form soft, large curds, not small, dry ones.
How long? Total cooking time is about 3-5 minutes, depending on your heat level.
The visual test: The eggs should look like they need another 30 seconds of cooking. That’s when you’re done.
Step 8: Remove from Heat Immediately
Pull the pan off the stove. The residual heat will continue cooking the eggs for another 30-60 seconds (carryover cooking).
Step 9: Finish and Serve
Transfer the eggs to a warm plate. They should be soft, custardy, and almost creamy.
Finish with a sprinkle of flaky sea salt, freshly ground black pepper, and fresh chives or parsley if desired.
Serve immediately. Creamy scrambled eggs wait for no one.
My Best Tips for Creamy Success
Use low heat. This is non-negotiable. High heat creates rubbery eggs. Low heat creates tender, custardy eggs.
Use a rubber spatula. Metal spatulas can scratch nonstick pans. Rubber or silicone spatulas are gentle on the pan and gentle on the eggs.
Stir constantly. Don’t walk away. Don’t multitask. Creamy eggs require attention.
Pull them off early. If your eggs look done in the pan, they’re already overcooked. Remove them when they’re still glossy and soft.
Use room temperature eggs. Cold eggs seize up and cook unevenly. Leave them on the counter for 15-30 minutes before cooking.
Don’t add milk or cream. It dilutes the egg flavor and adds water. The creaminess comes from technique and butter, not additives.
Salt before cooking. This is controversial, but it’s correct. Salting eggs before cooking tenderizes the proteins and improves texture.
HomeHow to Make Perfect Scrambled Eggs Every Time
How to Make Perfect Scrambled Eggs Every Time
4 large eggs (room temperature – this matters!)
2 tablespoons unsalted butter (cold butter, cut into small cubes)
¼ teaspoon salt (flake sea salt or kosher, not fine table salt)
Freshly ground black pepper (optional, to finish)
Fresh chives or parsley (optional, for garnish)
Why room temperature eggs matter:
Cold eggs seize up when they hit a warm pan. Room temperature eggs (take them out of the fridge 15-30 minutes before cooking) incorporate more smoothly and cook more evenly.
Step-by-Step – The Foolproof Method
Step 1: Crack and Whisk (Gently)
Crack the eggs into a medium bowl. Add the salt.
Important: Salt the eggs before cooking. This breaks down the egg proteins slightly, resulting in more tender curds.
Whisk with a fork until the whites and yolks are fully combined. You want a uniform yellow color with no streaks. Don’t over-whisk (you’re not making meringue), but don’t under-whisk (streaky eggs are uneven).
How long? About 30 seconds.
Step 2: Prep Your Butter
Cut the cold butter into small cubes. You’ll add it in two stages.
Step 3: Heat the Pan (Low and Slow)
Place a nonstick skillet over low heat. Not medium-low. Not medium. Low.
Add half the butter cubes (about 1 tablespoon). Let them melt slowly. The butter should foam gently but not brown. If it sizzles aggressively, your pan is too hot. Remove it from the heat for a moment to cool down.
Step 4: Add the Eggs (And Wait)
Pour the eggs into the pan. Then—here’s the hardest part—do not touch them for about 30 seconds.
Let the eggs sit undisturbed. You’ll see the edges begin to set while the center remains liquid. This is correct.
Step 5: Stir Constantly (But Gently)
Using a rubber spatula, begin stirring slowly but constantly. Scrape the bottom of the pan, pushing the set eggs toward the center. Tilt the pan so the liquid egg runs back to the edges.
The technique: You’re not scrambling like you’re stirring a pot of chili. You’re folding, pushing, coaxing. Think “gentle” and “slow.”
Step 6: Add the Remaining Butter
After about 1-2 minutes, add the remaining butter cubes. Stirring constantly, let them melt into the eggs.
The butter does two things: adds richness and helps regulate temperature (the cold butter cools the eggs slightly, slowing down cooking).
Step 7: Watch for the “Shiny” Stage
Continue stirring and scraping until the eggs are mostly set but still look moist, shiny, and slightly underdone. They should form soft, large curds, not small, dry ones.
How long? Total cooking time is about 3-5 minutes, depending on your heat level.
The visual test: The eggs should look like they need another 30 seconds of cooking. That’s when you’re done.
Step 8: Remove from Heat Immediately
Pull the pan off the stove. The residual heat will continue cooking the eggs for another 30-60 seconds (carryover cooking).
Step 9: Finish and Serve
Transfer the eggs to a warm plate. They should be soft, custardy, and almost creamy.
Finish with a sprinkle of flaky sea salt, freshly ground black pepper, and fresh chives or parsley if desired.
Serve immediately. Creamy scrambled eggs wait for no one.
My Best Tips for Creamy Success
Use low heat. This is non-negotiable. High heat creates rubbery eggs. Low heat creates tender, custardy eggs.
Use a rubber spatula. Metal spatulas can scratch nonstick pans. Rubber or silicone spatulas are gentle on the pan and gentle on the eggs.
Stir constantly. Don’t walk away. Don’t multitask. Creamy eggs require attention.
Pull them off early. If your eggs look done in the pan, they’re already overcooked. Remove them when they’re still glossy and soft.
Use room temperature eggs. Cold eggs seize up and cook unevenly. Leave them on the counter for 15-30 minutes before cooking.
Don’t add milk or cream. It dilutes the egg flavor and adds water. The creaminess comes from technique and butter, not additives.
Salt before cooking. This is controversial, but it’s correct. Salting eggs before cooking tenderizes the proteins and improves texture.
Common Mistakes (And How to Avoid Them)
Mistake Why It’s Wrong The Fix
High heat Makes eggs dry and rubbery Use low heat. Be patient.
Over-stirring Creates small, dry curds (or scrambled egg paste) Stir gently. Less is more.
Cooking until dry Eggs continue cooking off the heat Pull the pan when eggs look slightly wet.
Adding milk or cream Dilutes flavor, adds water Use butter instead.
Metal spatula in nonstick pan Damages pan, may release chemicals Use silicone or rubber.
Forgetting salt Unsalted eggs are bland Salt is not optional.
French-Style vs. American-Style (What’s the Difference?)
Feature French-Style American-Style
Heat Very low Medium-low
Stirring Constant, gentle Occasional, folding
Butter More (adds richness) Moderate
Curd size Small, creamy, custardy Larger, fluffy, substantial
Texture Almost like a sauce Soft but distinct curds
Best for Toast, croissants, elegant brunches Hearty breakfasts, burritos, plates
This recipe leans French but is simplified for home cooks. It’s creamy, custardy, and rich—but still approachable.
For American-style larger curds, use medium-low heat and stir less frequently (every 30 seconds instead of constantly). Cook slightly longer.
Variations (Once You’ve Mastered the Basic)
Extra Rich (French-Style) – Add 1 tablespoon of crème fraîche or sour cream off the heat. Stir gently. The eggs become impossibly creamy.
Cheesy Scrambled Eggs – Add ¼ cup shredded Gruyère, cheddar, or Parmesan in the last minute of cooking. Stir until melted.
Herbed Scrambled Eggs – Fold in 1 tablespoon fresh chopped chives, parsley, tarragon, or dill after removing from heat.
Smoked Salmon Scrambled Eggs – Fold in 2 ounces of chopped smoked salmon off the heat. Finish with chives and a squeeze of lemon.
Truffle Scrambled Eggs – Drizzle ½ teaspoon truffle oil over the eggs just before serving. (A little goes a long way.)
Spicy Scrambled Eggs – Add a pinch of cayenne pepper or red pepper flakes with the salt.
How to Scale for a Crowd
Cooking for 2-3 people? The method above works perfectly.
Cooking for 6 or more? Do it in batches. Do not overcrowd the pan.
Batch method: Cook 4-6 eggs at a time. Transfer to a warm plate. Cook the next batch. Combine and serve. Eggs cook too fast to do a dozen at once.
Alternative: Use a larger pan (12-inch) and increase butter slightly. Cook 8-10 eggs at once, stirring constantly. Add 1-2 minutes to cooking time.
Frequently Asked Questions
Can I use a stainless steel pan instead of nonstick?
You can, but eggs stick to stainless steel. Use plenty of butter and keep stirring. Nonstick is easier.
Why are my eggs watery?
You added milk or cream (don’t), or you overcooked them (squeezing out moisture), or your eggs were old (older eggs have thinner whites).
Can I make creamy scrambled eggs without butter?
You can use olive oil, but the flavor and texture will be different. Butter is traditional for a reason.
Why do restaurant scrambled eggs taste so good?
They use butter. Lots of butter. Also, they cook them to order (fresh, not sitting under a heat lamp).
Can I reheat creamy scrambled eggs?
You can, but they won’t be as good. The proteins will continue to tighten, squeezing out moisture. Reheat gently in a microwave at 50% power for 20-30 seconds.
What’s the best pan for creamy scrambled eggs?
A good nonstick skillet (8 or 10 inch). A well-seasoned carbon steel pan also works. Avoid cast iron (eggs stick).
A Creamy, Custardy Conclusion
Here’s what I’ve learned from years of making creamy scrambled eggs.
The difference between good eggs and great eggs isn’t a secret ingredient. It’s not a fancy pan. It’s not even the quality of the eggs (though fresh, pastured eggs are noticeably better).
It’s patience.
Low heat. Constant stirring. Pulling them off the stove before they look done. That’s it. That’s the whole secret.
Most people are in a hurry. They crank the heat. They stir like they’re fighting the eggs. They end up with dry, rubbery curds that need ketchup to be edible.
You don’t have to be most people.
Take the extra two minutes. Use low heat. Stir gently. Trust the process.
And when you slide those soft, silky, custardy eggs onto toast and take that first bite, you’ll understand.
Perfect scrambled eggs aren’t hard to make. They just require respect.
Now I’d love to hear from you. How do you make your scrambled eggs? Are you a low-and-slow convert or a high-heat scrambler? Have you ever added crème fraîche? Drop a comment below – I read every single one.
And if this guide helped you up your egg game, please share it with a friend who’s still murdering their scrambled eggs. A text, a link, a conversation. Good breakfast is worth sharing.
Now go crack some eggs. And be gentle with them. 🍳🧈
Next »
